- AVE :- computes the average of the number list.
- SUM :- calculate the sum of the numbers.
- s :- computes the standard deviation.
The results of these calculations can be captured via the Clipboard, to be used in other programs.
THE WORD PROCESSORS - NOTEPAD AND WRITE
You can type in documents and/or letters using a word processor program. The documents you type are stored in the computer's storage device, generally the hard disk as files. These documents files can be loaded later from the hard disk to be corrected or printed.
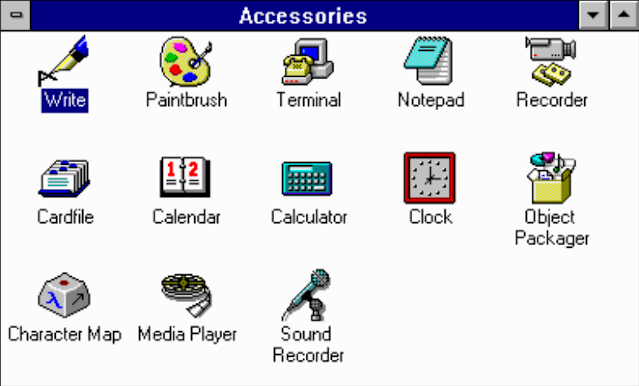
Microsoft Windows has two inbuilt word-processing packages - Notepad and Write. Although these programs can be classified as elementary editing programs (considering the features offered by the full-fledged Windows word processor programs like MS-Word or Ami Pro), some basic editing techniques used in Write and Notepad remain the same across all Windows-based word processors.
The Notepad's utility is purely that of a jot-pad. This package produces text files which can thereafter be read into any other word-processor. It is the most convenient editor for programmers.
Write is a graphical word-processor. You can use pictures created in other programs like Paintbrush in the midst of your text. Text can also be made to appear in different fonts, and can also be assigned attributes like underline, boldface, italics, etc.
When a software program prints out the graphics and fonts exactly as it appears on screen, the software is said to support WYSIWYG (What You See Is What You Get). Write supports WYSIWYG. This feature is not available in Notepad.
EDITING TECHNIQUES
As you load Write or Notepad, you are presented with a "I" cursor and the mouse pointer appears as an "I". The "I" is called the insertion point, and the "I" cursor is called the I-beam-pointer. As you move the mouse within the edit screen, the I-beam-pointer moves along too. A mouse click at a particular location transfer the insertion point to that location. Thereafter, the insertion point is your keyboard cursor. Use the arrow keys to move across the document. The Del key or the backspace key may be used to delete characters. If you have to delete a contiguous set of characters (a "block" or text), the best method would be to select the text and the press the Del key.
The block the text in a document, move the I-beam-pointer to the required location in the text. Begin with a click and drag the mouse to the end of the required text. Release the mouse button. The text is highlighted.
In fact, whenever a job has to be performed on a set of characters, select the text and then perform the required function. For instance, to change the font (typeface) of a set of characters in Write, first select the set of characters, then use the menu options Character - Font to select the font to be applied to these characters.
To undo an option wrongly executed, use the Undo option in the Edit menu in both the programs.
The Edit menu also offers some regular features like Cut, Copy and Paste.
MOVING BLOCK
Many a times, a paragraph or a set of statements needs to be repositioned in your document. This will amount to "cutting" that block from its original position and "pasting" it to a new location.
Cutting a Block : After you have highlighted your block, choose the Cut option on the Edit menu. This block is cut and put away in the computer's memory - in a specially allotted area called the Clipboard.
Pasting a Block : To paste a block from the Clipboard, position your insertion point at the right location in the document. Now issue the Paste command from the Edit menu, and Windows put back your piece of text at the insertion point.
COPYING A BLOCK
When a certain piece of text has to often repeated, the Copy-Paste technique is to be used. Block the text required, and use the Copy option from the Edit menu. With that, a copy of the selected text is recorded on the Clipboard. You can thereafter use the Paste command of the Edit menu, and paste the copy of text where required.
You can paste the same text from the Clipboard as many times as you want in your document.
Furthermore, most windows programs - Accessories and Applications - use the followinf standard keyboard combinations :
- Ctrl X - to Cut
- Ctrl C - to Copy
- Ctrl V - to Paste a block of highlighted data.
Note :- The Cut - Paste and Copy - Paste techniques work across documents as well applications.
PAINTBRUSH
Paintbrush is the drawing software provided by Windows, The name itself suggests its utility.
Let's explore its features.
You open up paintbrush with a double-click on its icon, or Run it from your File menu with the name of PBRUSH.
Your Paintbrush Window looks like an artist's work-shop. Your tools are stacked on the left, the menu bar runs along the top and your color palette is placed at the bottom with the ' brush stroke' sizes placed on the left bottom corner.
Since Paintbrush is so versatile, for any service you avail of here, there are a set of general guidelines to help you get the most out of it.
- Use drawing tools to create an image.
- Use editing tools (in the edit menu and tool bar) to rearrange your image.
- Save the picture whenever your create something worthwhile.
SELECTING A TOOL
To use a drawing tool, you click the tool icon and then, move the mouse pointer onto the drawing area. The mouse pointer changes shapes depending on the tool selected.
 |
| Image belongs to © 2021 DipakNehate.com |
Airbrush
This creates a smudge or a spray effect in the chosen color. To change color you move to the color palette and click at the color required.
Paint Roller
Think of the roller as a bucket of paint you pour over your work. All you have to do is pick the tool, choose again. The enclosed area if filled with the specified color.
Paint Brush
This is the tool for free-hand drawing. The brush can take six shapes. The shape required can be selected from the Options Menu with the Brush Shapes command.
Straight Line
Using the straight line tool is very easy. Click the tool and the color, move to the drawing. and click where the lines should begin. Drag to desired end point and release.
Curved Line
To construct a curved line, begin by drawing a straight line. Thereafter, Paintbrush uses two clicks to confirm the curvature of the line drawn.
Square And Rounded Boxes
- Click any of the four and you get a box.
- Click the tool.
- click the color required
- click where the box should begin (a corner) and drag diagonally.
- Release when done.
Circles and Ellipses
Use these tools to create circles or ellipses. Begin with a click and drag in the direction required.
The Polygons
This is a more flexible tool than the Circle and the Box. You may create any Polygon you want. Just drag and click from one point to another until you reach the starting point again. You can also double-click at any time to joint the last point drawn to the starting starting point.
The ABC Tool
This is a Text tool. With a click on the tool you get a familiar insertion pointer to type in Text. While typing in the text, you may change fonts and attributes using the Text menu.
Eraser
These are Erasing tools. One is a regular eraser, while the other leaves the background intact. Use them when you have damaged a good looking drawing.
Pick & Cut Tools
These are also called the Scissors Tools. They are used to mark a portion of the screen. Click and drag until the picture is surrounded by a dot-lined enclosure. Once this is done, the section of screen which has been marked can be Copied, Cut and Pasted through the clipboard.
FLIPPING PICTURES HORIZONTALLY AND VERTICALLY
You can pick a drawing and then Flip the drawing Vertically or Horizontally. Use the Scissors Tool to pick the drawing. Choose the Flip Horizontal from the Pick menu. You get a mirror image of your picture on the screen.
Similarly, the picture can be Flipped vertically with Pick and Flip Vertical options.
SHRINK AND GROW PICTURES
A picture once drawn can be sized - increased or decreased. Mark the picture with a Scissors tool, then select the Pick option and click on the Shrink and Grow. Construct an outline box to indicate the new size. Your picture is either Shrunk or Grown depending on your outline box.
ZOOM IN AND ZOOM OUT
To edit minute parts of a picture, you can blow up that part of the screen and then take the remedial measures. To do this, select Zoom in from the View menu. The cursor takes the shape of a box. Move the box to the area you want to edit and click. An enlarged view of the area will appear. Choose the tool requires to edit it.
SAVING AND PRINTING
You can save and print a drawing with the Save as and Print options from the File menu.
THE CLIPBOARD
Windows reserves a portion of memory called the clipboard, which can be accessed from any program. You can copy a piece of screen data to the clipboard from the Paintbrush program, and recall the data from the clipboard into Write. This facility of data transfer within Windows makes it a powerful software.
When you execute the commands Edit-Copy or Edit-Cut, after highlighting a part of the picture or data, you send a copy of the same to the clipboard. This piece of information in the clipboard may be recalled either in the same program, or in another program, with the commands Edit-Paste.
The Clipboard can store one block at a time. Should you like to see what is stored in our clipboard at any point, use the Clipboard Viewer program icon, generally available in the Main group.


